
-
 Shopping Cart (0)
Cart Total:
Your cart is currently empty..
Vape Troubleshooting
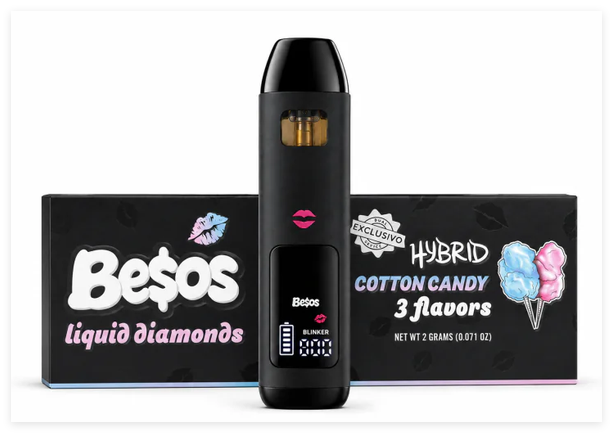
BESOS 3 Flavors Switch Empty Vape Hardware: Activation Failure & QC Diagnosis
- Saturday, 10 October 2026
- 0
- 105
- 0
The BESOS 3 Flavors Switch Empty Vape Hardware combines multiple flavor channels with a switch-based activation system, creating more hardware components to evaluate than a standard single-flavor device.
For wholesale buyers and OEM brands, an activation failure should not automatically be treated as a battery problem. Airflow restrictions, protective seals, switch contacts, component alignment, assembly variation and electrical issues can all affect whether the hardware activates correctly.
This guide explains the main activation failure points to evaluate when inspecting BESOS 3 Flavors Switch empty vape hardware. The focus is on sample testing, QC diagnosis and supplier evaluation before filling or mass production.
Key Takeaways
-
Check the battery first. A depleted battery is one possible cause of activation failure and should be checked early during QC diagnosis.
-
Clean the contacts and threads often. Dirty connections can make the device blink and work poorly.
-
Remove protective seals and clear airflow clogs. New devices often have stickers or plugs that block airflow.
-
Understand the blinking patterns. Different patterns signal specific problems, like low battery or puff-time cutoff.
-
Return defective units. If repairs fail, the device likely has a factory defect.
Activation Failure and QC Diagnosis Basics
BESOS 3 Flavors Switch Activation Failure: Common QC Causes
A draw-activated disposable vape is a complete system with a battery, a reservoir, and an atomizer. Most modern disposables use an auto-draw mechanism. A pressure-sensitive diaphragm senses the air-pressure change when a user inhales. It then tells the battery to power the coil. If any part of this chain breaks, the device will fail to make vapor. This is why activation failure and QC diagnosis must cover the whole chain, not just one component.
A new disposable vape that is not working may have a faulty unit, a dead battery, leaked vape juice, or blocked airflow. You should isolate each cause during troubleshooting. A quality control analysis helps find the root problem. The table below shows common diagnostic indicators.
|
Diagnostic Indicator |
Hardware Cause or QC Specification |
|---|---|
|
Base LED error codes when device is not hitting |
Depleted lithium-ion cell or active short-circuit trip |
|
LED flashes 5 times |
Low-Voltage Battery Lockout Sequence |
|
Draw activation method |
Breath-actuated sensor; inhale to engage |
|
Charging input parameters |
Regulated USB-C at 5V/1A |
|
Continuous-pull safety |
10-Second Automatic Thermal Cutoff |
|
Airflow restriction |
Clear condensed oil via gentle dry pull |
Initial Visual and Battery Checks
Start by making sure the reservoir has liquid. Hold the device upright and let thick e-liquid settle. If the level sits below the wicking holes, the device is basically empty. Next, check pod seating. Remove the pod and reinsert it firmly to break any vacuum seal. A poor seal can block liquid flow and cause dry hits.
Look at accessible contacts and the mouthpiece for visible debris. Clean only as the manufacturer directs. Do not submerge battery hardware or pour cleaning liquid into the airflow path. Check the small intake holes on the side of the device for lint or debris. Clogged airflow limits vapor production and can act like an empty reservoir.
If the device keeps blinking, this often points to a depleted cell or an active short-circuit trip. Blinking that will not stop suggests a connection issue. Fast blinking often means a blocked airpath. Intermittent activation may mean a loose internal wire. A solid light with no vapor means the coil connection is broken. No light at all means the device is completely dead or the sensor is blocked. Flashing patterns help narrow the diagnosis. Flashing five times signals low-voltage lockout. Bestvapesupply offers fast shipment services and overseas warehouses make it a trusted source for reliable hardware.
Step-by-Step Troubleshooting for Switch Vapes
Checking Battery and Charging Connection
A weak or dead battery is the most common reason a switch vape will not fire. Users should verify the battery has sufficient charge before concluding the hardware is defective. Rechargeable hardware with a low cell can show activation failure until charged. A partially charged battery can mimic a malfunction with weak vapor or short battery life. Users should always use the charger supplied or recommended by the manufacturer. Incompatible chargers may cause charging failure or battery damage.
This plate activates the cartridge and allows the charger to transfer power back to the battery. Even if the LED still turns on during a draw, the battery may be activating without transferring power to the cartridge. This is a common issue and does not necessarily mean the battery or cartridge is defective. A user can gently pry it up with a paperclip before screwing on the charger or cartridge.
A simple step-by-step troubleshooting sequence helps isolate battery connection failures. First, confirm the battery is properly connected and that its metal contacts are clean. Second, charge the device fully before retesting. Third, test with a known-good battery or test the suspected battery on another compatible device. Fourth, measure battery voltage with a multimeter to ensure it matches the rated capacity. Significantly lower readings may indicate partial discharge, internal damage, or aging. Non-rechargeable disposables may be permanently dead once the battery is depleted. These troubleshooting steps save time and prevent unnecessary replacements.
Three-Channel Activation Testing
Three-Channel Activation Testing
A multi-flavor switch platform requires channel-by-channel testing. If the hardware provides independent flavor selection, each available position should be checked separately rather than testing only the overall device.
- Confirm the device has sufficient power according to the manufacturer's specification.
- Test the first channel and record the activation response.
- Repeat the test for the second channel.
- Repeat the test for the third channel.
- Compare airflow and activation consistency between channels.
- Document any channel that fails, activates intermittently or behaves differently from the approved sample.
Cleaning Switch Contacts and Threads
Dirty contacts cause intermittent activation and persistent blinking. Users should clean threads before changing tanks or cartridges to prevent residue buildup. The following ordered procedure restores a reliable electrical connection.
-
Power off the battery and unscrew the cartridge. Inspect for cracks, swelling, corrosion, or stripped threads.
-
Wipe the exterior with a dry lint-free cloth. If sticky, lightly dampen the cloth with isopropyl alcohol.
-
Clean mouthpieces with a cotton swab dipped in isopropyl alcohol. Remove excess liquid first. Gently rotate the swab around the threads.
-
Clean the center contact with a pointed cotton swab lightly moistened with isopropyl alcohol. Remove oil, dark residue, and light oxidation.
-
Let everything dry completely before reinstalling the cartridge. Screw the cartridge in until snug, but do not force or overtighten it.
Users should avoid needles, knives, or screwdrivers on the threads. Do not aggressively pry the center contact upward. Excessive force can damage the insulator, contact assembly, or internal wiring. Do not overtighten the cartridge. Excessive tightening can stress threads or compress the center contact. Persistent blinking after cleaning points to a deeper hardware fault. Intermittent activation that continues after these steps suggests internal damage. A device that keeps blinking and is not working may need replacement.
Airflow, Seals, and Clog Diagnosis
Removing Protective Seals and Plugs
New vape hardware often comes with protective seals and silicone plugs that block airflow. These safety features stop leaks during shipping. They also cause activation failure if users forget to take them out. A sticker over the airflow intake holes at the base creates a vacuum lock. This lock stops the draw-activation sensor from triggering. A deep silicone plug in the mouthpiece blocks the internal chimney. Vapor cannot flow at all until someone fully pulls it out.
Users should check both locations before first use. The base sticker may cover the intake holes and the LED. The mouthpiece plug sits inside the chimney. A careful visual check and a gentle dry pull help confirm the airway is clear. If the device still blinks after seal removal, the problem is somewhere else.
Clearing Clogs and Air Bubbles
Condensed oil and debris can block the mouthpiece or the airflow sensor. A gentle blow through the mouthpiece pushes residue out of the intake holes. Users should place a paper towel over the intake holes first to catch the mess. A preheat cycle warms hardened oil and makes it flow again. A dry pull without firing also draws out condensation from the airflow channel.
Air bubbles trap oil away from the coil and cause weak vapor or no activation. Cold temperatures increase e-liquid viscosity. This thicker liquid traps bubbles more easily. Warming the device to room temperature reduces viscosity and helps bubbles rise. Gently tapping the device also dislodges bubbles. Thicker e-liquids need more time to settle. Users should store the device upright to prevent oil from pooling at the mouthpiece.
Debris or residue blocking the airflow sensor can mimic draw sensor malfunctions. A cotton swab lightly dampened with isopropyl alcohol cleans the mouthpiece and air holes. Users must never submerge the full cartridge. Alcohol reaching the coil causes permanent damage. Persistent blinking after these steps points to a deeper hardware fault.
Specific Blinking Patterns and Signals
Disposable Cart Blinking Explained
A device that blinks and will not hit may signal several issues. It could be low power, blocked airflow, an empty reservoir, a broken internal part, or a triggered puff-time safety cutoff. Each issue sends a different blink signal. Users can read signals like these to find the cause fast.
A blinking disposable vape cart uses light codes to tell its status. The table below matches common blinking signals to their likely causes.
|
Blinking Pattern |
Meaning |
|---|---|
|
Low battery, connection problem, or short-circuit protection |
|
|
Puff-time cutoff triggered |
|
|
Complete battery depletion |
|
|
10+ rapid flashes |
Short circuit or internal malfunction |
|
Poor 510 connection from dirty contacts |
A cart that blinks 3 times may have a low cell, dirty contacts, or a bad coil. Users should clean the threads and charge the battery before they assume the worst. A 10-blink pattern means the battery is dead and needs a charge. A red light often means the charge is low. Blinking white light points to a poor connection. Users should make sure the mouthpiece is clear and the device was not kept in very cold weather. Blinking that continues after cleaning means a deeper issue.
Puff-Time Cutoff and Reset
Devices with a puff-time safety cutoff may stop working after a long pull. The battery turns on this protection when a draw goes past the 10-second timer. The device then flashes 5 times quickly. This is normal, not a defect. Wait a few seconds before you try again. That wait is part of normal activation checks. Users should take shorter draws so the cutoff does not keep turning on.
If flashing happens only after long draws, the cutoff is working. Users who see this signal should change how they draw instead of replacing the device. If blinking keeps going after a pause, the problem is different. Users should check the battery charge, clean the contacts, and look at the airflow path. This step-by-step plan tells normal safety features apart from real hardware faults.
Factory QC Defects That Can Cause Activation Failure
| Potential Defect | Possible Result | Recommended QC Action |
|---|---|---|
| Assembly misalignment | Intermittent activation | Compare against approved sample |
| Switch contact variation | Selected channel does not activate consistently | Repeat switch-cycle testing |
| Internal connection defect | No or intermittent activation | Remove failed units from production |
| Airflow sensor issue | Draw does not trigger activation | Check airflow and activation response |
| Heating circuit defect | Activation without expected output | Verify heating response against specification |
Poor Soldering and Loose Wiring
Some activation failures start at the factory. Manufacturing defects like bad soldering, cold joints, loose wiring, damaged circuit boards, or a broken switch part can stop power from reaching the coil. These flaws create signals that look like normal connection problems. During activation failure and qc diagnosis, the clearest clue is a device that works once, then goes silent. Intermittent activation failures often come from loose internal battery connections in serviceable hardware. Frequent blinking that continues after a full charge and clean contacts points to internal damage, not user error. Blinking after a fresh charge, blinking after cleaning the threads, and even blinking with a different cartridge all point to a broken internal circuit.
|
Defect |
Effect on Firing |
|---|---|
|
Poor soldering / cold joints |
Total failure; power cannot travel from battery to atomizer |
|
Loose wiring |
Unstable connection; battery cannot supply steady power |
|
Defective switch components |
Draw sensor never fires; no vapor on inhale |
|
Damaged circuit boards |
Device remains unresponsive |
|
Intermittent connection |
Works at random times; activation cuts out mid-draw |
Before opening a serviceable unit, a user can confirm a suspected internal fault with a simple continuity test. A multimeter set to resistance mode checks the switch and the wire path from the battery to the coil. A stable reading near zero ohms means a good connection. A reading that jumps around points to a cold joint or a loose wire. This test helps avoid unnecessary disassembly and gives a clear target for soldering work.
Home fixes only make sense on hardware with a serviceable shell. Reflowing a cracked solder joint requires a fine-tip soldering iron. Reconnecting a loose wire means opening the battery compartment after removing the cartridge. Adjusting switch contacts can restore a sensor that refuses to trigger. Always disconnect the battery before any internal work. If a user sees melting, swollen cells, or burnt insulation, they must stop and discard the unit.
For sealed one-piece devices, opening the shell damages the airpath and the lithium cell. Troubleshooting a switch vape that blinks repeatedly should stop at the seam. The safe route is return.
When to Return or Replace
A sealed vape that stays unresponsive, or one that keeps blinking, after the protective caps or airflow seals are removed, the airway is checked, and official charging instructions are followed should not be opened, punctured, or repaired. If it is damaged, leaking, overheated, or still fails to activate, isolate it and return it through the licensed retailer's support process. This step protects the user and keeps defective hardware out of circulation.
Persistent blinking after seal removal, blinking after a reset, and blinking on a known-good cartridge leave little doubt about the verdict. That pattern is a clear sign of failure. Many retailers use this same activation failure and qc diagnosis checklist before approving returns. A product that keeps blinking when everything else checks out has crossed from fixable to faulty.
When troubleshooting and repair steps fail because of permanent cell degradation, replacement units should be obtained through trusted retail collections.
Bestvapesupply provides OEM services and customization options for customers seeking tailored vaping solutions, so a buyer can order hardware with stricter internal inspection requirements.
Users can fix most activation problems with a simple step-by-step plan. They should check the battery first, clean the contacts, clear the airflow, remove protective seals, and test the switch. A device that keeps blinking often works again after these steps. Blinking that continues after a full charge points to a real defect. Blinking after cleaning suggests internal damage. Blinking on a known-good cartridge confirms the unit has failed. When the device is not working after every check, the failure is likely a manufacturing defect. Users should return or replace that unit instead of opening it.
Good habits extend hardware life and prevent future issues:
-
Keep the battery between 20% and 80% charge, and avoid full discharges.
-
Use the original charger, and unplug once charging completes.
-
Clean mouthpiece and USB ports weekly with isopropyl alcohol.
-
Turn the device off when idle to prevent accidental firing.
FAQ
Why does BESOS 3 Flavors Switch hardware fail to activate?
Activation failure can result from insufficient battery power, restricted airflow, protective components, switch-contact issues, internal assembly variation or other hardware defects. The exact cause should be determined through controlled QC testing.
Can airflow problems cause activation failure?
Yes. Draw-activated hardware relies on airflow or pressure changes to trigger the activation system. A blocked intake or airflow path can prevent normal activation.
Should each flavor channel be tested separately?
Yes. For multi-channel hardware, each available channel should be tested independently so that a channel-specific activation or heating problem can be identified.
Can a clogged airflow path cause activation failure?
Yes. Condensed oil and debris block the mouthpiece or the airflow sensor. A gentle dry pull or a preheat cycle clears residue. Air bubbles also trap oil away from the coil. Gently tapping the device helps dislodge them. Flashing often stops once the airway is clear.
Should buyers repair sealed hardware themselves?
No. Sealed hardware should not be opened or modified by the buyer. If external checks do not resolve the issue, the affected units should be isolated and reported to the supplier for evaluation.
About This Article
Written by: Best Vape Supply Hardware Engineering Team
Reviewed by: Product Development & Quality Control Team
Focus Areas: Multi-Flavor Switch Hardware, Activation Systems, Airflow Diagnosis, Hardware QC and OEM Manufacturing.
0users like this.
0comments
- Empty Vape Hardware
- OEM vape hardware
- Dual Chamber Vape Hardware
- Thick Oil Vape Hardware
- dual chamber vape hardware
- Disposable Vapes
- Packman 4G
- ACE Ultra
- ACE Ultra Vape Pen
- Empty Disposable Hardware
- postless vape hardware
- OEM Manufacturing
- Rechargeable vape hardware
- Dual Chamber Hardware
- 10/10 Boys Switch
- Fryd dual chamber vape
- Fryd vape pen
- Fryd 2g
- Fryd disposable 2ml
- DRANKS DUAL Disposable Vape
- dual flavors
- Vape Battery
- HITZ ZEUS EDITION 2G
- HITZ Infinity Blue 2ML Pens
- HITZ Infinity
- HITZ ZEUS
- Dual Chamber Vape
- 2g Disposable
- Dual Tanks vape pen
- Disposable Vape Pens
- Wholemelt Phase Five Switch Vapes
- Wholemelt Switch Vapes 2G
- Wholemelt Vapes 2G
- DUAL Disposable Vape
- 2ML Dual Tanks
- 2G Disposable Vape
- MUHA MEDS Gen
- Splitz Vape Pen
- Splitz Vapes 2G
- Muha meds 2G
- Splitz 2ml
- TURNONE 2ML Empty Vape Hardware
- TURNONE 2ML
- customization
- 2ML Empty Vape
- ACE 2ml Vapes
- Packman 2ml vapes
- Whole Melt Candy Shop Switch 2G
- Whole Melt Candy Shop Switch
- dual-chamber
- OG Cake
- Cake 2ml vapes
- OG Cake Vape Pen
- Cake 2G Vapes
- MUHA MEDS Gen 3
- Muha meds 2ml
- Muha meds Switch
- Muha Meds 2.5G
- Sherbinskis Quattro 2G
- activation failure
- FAVORITES Disposable 3G
- Disposable 3G
- FAVORITES Disposable
- FRYD SWITCH DISPOSABLE 2G
- FRYD Switch 2G
- disposable vape
- FRYD 2g
- Dual Chamber Pens
- HITZ ZEUS Edition 2G
- MUHA MEDS Melted Diamonds vape
- HITZ ZEUS 2G
- MUHA MEDS Melted Diamonds 3.5G
- Push V2 Summer Vape Pen
- Push V2 Summer Vape Switch
- Push 2G Vape Switch
- Push 2G Switch
- Boutiq Switch ORB V5 Triple Tank
- Boutiq Switch ORB V5
- Boutiq Switch
- Triple Tank Vape
- Packman Partyboyz Disposable Vape
- Packman Partyboyz 3G
- Packman vape pen
- Packman 2g vapes
- Raw Garden Adjustable Voltage
- Raw Garden 2G
- Raw garden Vapes
- Raw garden vape pen
- MUHA MEDS Empty Vape Pen
- SHERBINSKIS QUATTRO 2G
- MUHA MEDS 2g Vape Pen
- dual chamber Vape Pen
- Muha Meds empty vape
- 3.5ML Muha Meds
- Muha Meds 2ml
- Crybaby Trios 3G
- Crybaby Trios 3G Empty Disposable Vape
- disposable vape hardware
- Muha Meds Gen 3 empty hardware
- HitZ Infinity 2G empty hardware
- Slugger Hit 3G Triple-Chamber Vape
- Multi-Flavor Hardware
- disposable empty hardware
- Airflow Blockage
- Thick Oil Empty Vape Hardware
- thick oil vape cartridge
- OEM empty vape hardware
- DONUTS Switch GEN 2 E
- 2ML Dual Chamber Vape
- DONUTS Switch Pen 2ML
- Boutiq Switch V5
- Boutiq Dual Chamber
- Empty Vape Hardware Quality Control
- LUIGI V9 2G Empty Vape Hardware
- Donuts Gen 2 Dual Chamber
- Sprinklez Disposable Vape
- Sprinklez Disposable 2G
- Muha meds glass jars
- ACE Glass jars
- custom packaging
- UNIPUFF SWITCH DISPOSABLE 2G
- Muha Meds GTA edition
- Alien Labs Dual Empty Disposable 2G
- Alien Labs Dual
- vape pen overheating
- vape hardware troubleshooting
- vape battery overheating
- Raw Garden Vape Pen
- Ceramic Coil
- rechargeable disposable
- 2ML Empty Vape Hardware
- OG Cake Legendary Edition
- CRYBABY TRIOS 3 IN 1
- Multi-Chamber Vape
- manufacturing process
- BIG CHIEF DUO V3 Empty Vape Hardware
- Single Chamber Vape Hardware
- Sluggers Hit dual chamber
- OEM vape manufacturer
- 510 Thread Vape Cartridge
- Dual chamber
- LED screen devices
- All-In-One Vape Hardware
- Dual Vape Hardware
- 510 cartridge hardware
- ceramic vape cartridge
- OEM cartridge supplier
- ACE Ultra 2ml Dual Chamber
- Donuts Switch V4 Dual Chamber
- Single-Chamber Disposables
- Ceramic Coil Guide
- Thick Oil Hardware
- CALI CLEAR 2G
- Oil flow problems
- Ace Ultra Switch
- Ace Ultra Premium Empty Vape Hardware
- LED screen vape hardware
- Smart vape hardware
- Voltage Control
- Buzz Bar 3G Switch
- 10/10 Boys Single Flavor
- multi chamber vape hardware
- Sluggers Dual Chamber
- SMOOTHIE BAR BLEND 3.0 Switch
- Switch Empty Vape Hardware
- Multi-Chamber Empty Vape Hardware
- vape hardware airflow
- multi-chamber hardware leakage
- BESOS 3 Flavors Switch
- BESOS 3 Flavors Switch Empty Vape Hardware
- Slugger Hit 3 tanks SWITCH 3G
- 10/10 Boys Switch clogging
- SHERBINSKIS QUATTRO 2G dual chamber vape hardware
- Packman x Jeeter DUAL CHAMBER Vape Hardware
- 2G disposable vape
- Empty Triple-Chamber Vape Hardware
- OEM triple chamber vape hardware
- postless dual-chamber vape hardware
- ceramic vape hardware
- triple chamber vape hardware
- 1mL + 1mL dual-chamber vape
- dual-chamber empty vape hardware
- Khalifa Kush Switch
- HOLLOWTIPS 2G vape hardware
- HOLLOWTIPS 2G empty vape
- Hollow Tips 2G empty vape
- Hollowtips V1 empty vape hardware

Your cart is currently empty.